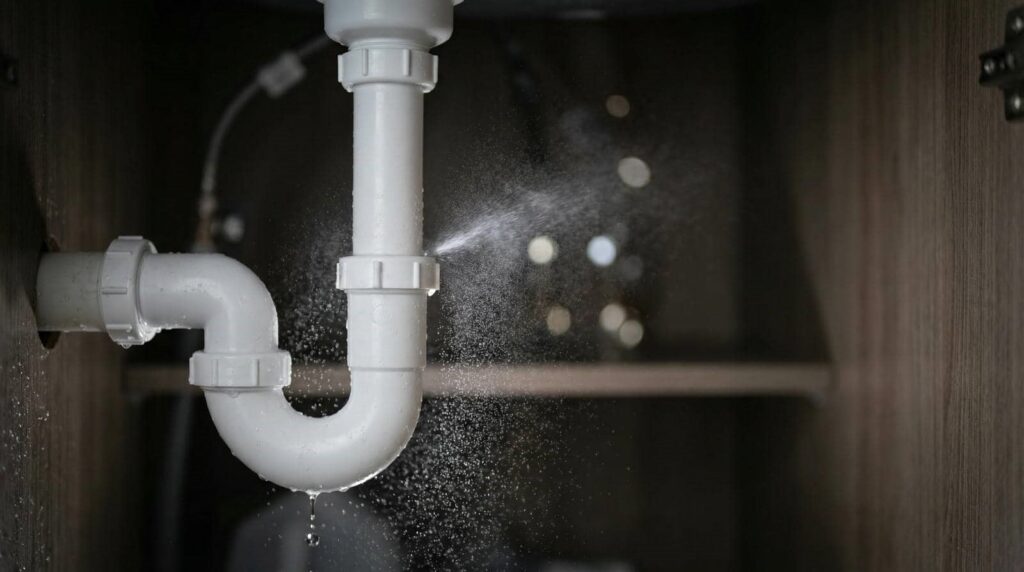
When disaster strikes, like a burst pipe flooding your home, swift action can mean the difference between minor damage and a major catastrophe. You need to know exactly what steps to take to mitigate the situation effectively. From turning off the water supply to documenting the damage, each action is vital. Discovering the right techniques can save you time and money in the long run. Let’s explore the essential cleanup tips you should follow.
Key Takeaways
- Turn off the main water supply immediately to prevent further flooding and damage.
- Use a wet/dry vacuum to quickly remove standing water from floors and carpets.
- Dry out affected areas thoroughly with fans and dehumidifiers to prevent mold growth.
- Disinfect surfaces with EPA-approved cleaners, focusing on high-touch areas for safety.
- Document damage with photos and notes to assist with insurance claims and repairs.
Turn Off the Water Supply Immediately
When faced with a burst pipe, the first step you should take is to turn off the water supply immediately.
Locate your main water valve; it’s usually near your water meter or where the water line enters your home. Turning this valve to the off position will stop the flow of water, preventing further damage.
If your home has an emergency shutoff, use it instead for quicker access. Remember, every second counts, and acting swiftly can mitigate extensive water damage.
Once the water supply is off, you can focus on the next steps, knowing you’ve taken the essential first action.
Your prompt response protects your property and fosters a sense of community among those who face similar emergencies.
Assess the Damage and Prioritize Areas
After turning off the water supply, you need to assess the damage by identifying affected areas in your home.
Check for structural integrity to ensure safety and prevent further issues.
Prioritize safety measures to protect yourself and others while you begin the cleanup process.
Identify Affected Areas
Identifying affected areas after a burst pipe is essential for effective cleanup and damage control.
Start by locating the pipe’s source to determine which rooms are impacted. Check for water pooling in affected rooms, especially those directly adjacent to the pipe location.
Signs of damage include wet walls, ceilings, and floors, as well as any visible mold growth.
Prioritize areas based on the extent of water damage; for instance, basements and lower levels often suffer more severe effects.
Make a note of any electrical hazards or damaged belongings that need immediate attention.
Check for Structural Integrity
As you begin the cleanup process, it’s essential to assess the structural integrity of your home to confirm safety and prioritize your response.
Start with a thorough structural evaluation, focusing on key areas such as walls, ceilings, and floors. Look for signs of sagging, cracks, or water damage that could compromise stability.
Conduct a damage assessment to identify which areas require immediate attention and repair. Pay special attention to load-bearing walls and foundation integrity, as these are critical for the overall safety of your home.
Document your findings meticulously, as this information will be imperative for any insurance claims or repairs.
Prioritize Safety Measures
While you assess the damage from a burst pipe, prioritizing safety measures is essential to ensure a safe cleanup.
Start by wearing appropriate safety gear, including gloves, goggles, and waterproof boots, to protect yourself from contaminants.
Next, identify areas most affected by the water to focus your efforts effectively. Confirm that electrical systems are shut off to prevent hazards.
Keep emergency contacts handy; know who to call for professional help if the situation escalates.
Assess any structural damage immediately, and if the area feels unsafe, evacuate and wait for assistance.
Remove Standing Water Quickly
To prevent further damage, you need to remove standing water as quickly as possible.
Start by using a wet/dry vacuum to extract the bulk of the water.
For any remaining moisture, utilize absorbent materials to soak up what the vacuum can’t reach.
Use Wet/Dry Vacuum
When a pipe bursts and water starts pooling in your home, using a wet/dry vacuum is essential for quickly removing standing water. Wet vacuum techniques allow you to efficiently extract water from floors, carpets, and other surfaces, minimizing damage.
Start by selecting the appropriate vacuum setting for wet conditions, and verify you have the right attachments for tight spaces.
The wet vacuum benefits include rapid water removal, preventing mold growth, and reducing the risk of further structural damage. With a wet/dry vacuum, you can tackle even the toughest water emergencies.
Remember to empty the vacuum’s tank frequently to maintain suction power and efficiency. This proactive approach will help safeguard your home and restore comfort swiftly.
Absorbent Materials Utilization
In a burst pipe emergency, absorbent materials play a critical role in swiftly removing standing water from affected areas. You’ll find options like towels, mops, and commercial absorbent pads effective, but their performance varies.
For instance, while cotton towels can soak up considerable amounts of water, specialized absorbent pads often deliver superior moisture retention. When conducting an effectiveness comparison, consider how quickly each material absorbs and how much water it can hold before saturation.
It’s essential to layer these materials properly; for example, placing absorbent pads under furniture can prevent additional damage. Always keep absorbent materials on hand in your emergency kit, as they can greatly reduce water damage and speed up your cleanup efforts.
Dry Out Affected Areas Thoroughly
Since moisture can lead to mold growth and structural damage, it’s essential to dry out affected areas thoroughly after a burst pipe emergency.
Start with a moisture assessment to identify all impacted spots, including walls, floors, and furniture.
Utilize effective drying techniques such as high-powered fans, dehumidifiers, and open windows to promote airflow.
Make sure to focus on hidden areas where water may linger, like behind cabinets or under carpets.
Regularly check humidity levels and continue drying until you reach ideal conditions.
Remember, the sooner you act, the better you’ll prevent further issues.
Disinfect and Sanitize Surfaces
After thoroughly drying out affected areas, the next step involves disinfecting and sanitizing surfaces to eliminate any remaining contaminants. Proper cleaning ensures a safe environment for you and your loved ones.
Here are three effective steps to follow:
Choose the Right Disinfectant Types: Use EPA-approved disinfectants that effectively kill bacteria and viruses. Check the label for contact time requirements.
Apply Sanitizing Techniques: Use a spray bottle or cloth to apply your disinfectant, ensuring even coverage. Focus on high-touch areas like doorknobs, light switches, and countertops.
Rinse and Dry: After disinfecting, rinse surfaces if required by the product, and allow them to air dry completely to ensure maximum effectiveness.
These steps will help you maintain a healthy living space post-emergency.
Check for Mold Growth and Take Action
Once you’ve disinfected the affected areas, it’s crucial to check for mold growth, as moisture from a burst pipe can create an ideal environment for mold to thrive.
Inspect all surfaces, especially in corners and behind furniture, where dampness may remain hidden. If you notice any signs of mold—such as discoloration or a musty smell—act quickly. Use appropriate mold removal solutions and consider hiring professionals for extensive infestations.
To aid in mold prevention, maintain proper air circulation by opening windows and using fans to reduce humidity levels. Regularly monitor areas prone to moisture to prevent future occurrences.
Your proactive measures can create a safer, healthier living space for you and your loved ones.
Document the Damage for Insurance Purposes
In the aftermath of a burst pipe, documenting the damage is essential for a smooth insurance claim process.
Accurate damage assessment helps you understand the extent of the issue and supports your claim effectively.
Here’s how to document the damage:
Take Photos: Capture clear images of the damaged areas, including close-ups and wide shots to show context.
List Damaged Items: Create an inventory of all affected belongings, noting their condition and estimated value.
Record Events: Keep a timeline of when the burst occurred, when you reported it, and any actions taken for repairs.
Frequently Asked Questions
How Can I Prevent Burst Pipes in the Future?
To prevent burst pipes, you should install pipe insulation in vulnerable areas and maintain consistent temperature control throughout your home. This proactive approach minimizes freeze risks, ensuring your plumbing system remains intact and functional year-round.
Should I Contact a Plumber Immediately?
When water’s gushing like a broken dam, you must contact a plumber immediately. Quick emergency response is essential. Follow their plumbing advice to prevent further damage and restore your home’s safety and comfort.
What Supplies Do I Need for Cleanup?
You’ll need cleanup supplies like mops, towels, buckets, and a wet-dry vacuum. An emergency kit should include gloves, disinfectants, and plastic bags for waste. Having these ready helps you tackle the situation efficiently and confidently.
Can I Use a Regular Vacuum for Water Removal?
No, you can’t use a regular vacuum for water removal. For effective water extraction, consider a wet/dry vacuum. For instance, if your basement floods, this specialized vacuum quickly removes water and prevents mold growth.
How Long Does It Take for Walls to Dry Completely?
Drying time for walls varies by materials. Typically, drywall takes 24 to 48 hours, while plaster may need several days. Proper ventilation and dehumidification can greatly reduce this time, ensuring your space returns to normal quickly.
Wrap-Up
In a burst pipe emergency, swift action is your best ally. Turn off the water supply, assess damage, and prioritize affected areas. Remove standing water, dry thoroughly, and disinfect surfaces. Check for mold growth and take necessary action to mitigate risks. Document everything for insurance purposes, ensuring you have a clear record of the incident. By following these steps, you minimize damage, protect your home, and secure peace of mind in the face of adversity.