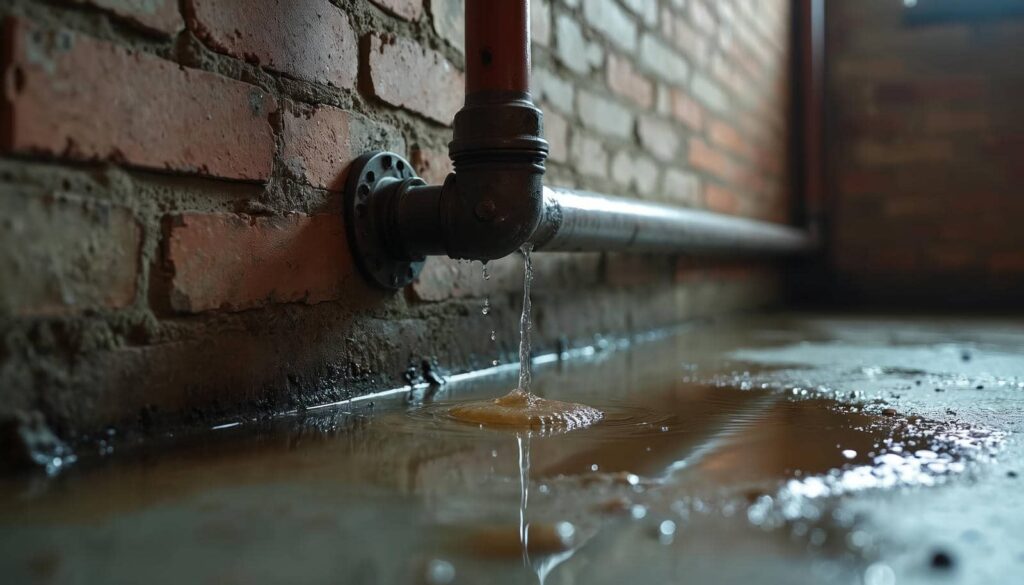
Is it true that a burst pipe can lead to extensive damage if not handled promptly? The reality is that quick action is vital to mitigate losses and restore your space. From evaluating the damage to preventing future incidents, there are essential techniques you need to know. Understanding these steps can make all the difference in how effectively you manage the situation. What are the specific techniques that can help you navigate this challenge?
Key Takeaways
- Inspect and document the damage thoroughly to assess the extent and aid in insurance claims.
- Shut off the main water valve immediately to stop further water flow.
- Remove standing water using a wet/dry vacuum or submersible pump to minimize damage.
- Dry the affected area with dehumidifiers and fans to prevent mold growth.
- Clean and disinfect surfaces to eliminate contaminants and prevent future mold issues.
Assessing the Damage
When a pipe bursts, evaluating the damage promptly is essential to prevent further complications. Start by inspecting the affected areas, noting any visible water damage, mold growth, or structural issues.
Document everything with photographs and detailed notes; this damage evaluation will be vital for your insurance claims. Check flooring, walls, and personal belongings to gauge the full extent of the damage.
If you notice significant issues, consider contacting a professional for assistance. They can provide a thorough assessment and help you understand the next steps.
Shutting Off the Water Supply
To prevent further water damage, you need to locate the main water valve and shut it off immediately.
This action stops the flow of water and minimizes the risk of additional flooding.
Don’t forget to turn off any appliances connected to the water supply to ensure they don’t contribute to the problem.
Locate Main Water Valve
How quickly can you locate the main water valve in an emergency? Knowing its main location is vital for minimizing water damage during a burst pipe incident.
Typically, you’ll find the water valve in the basement, crawl space, or near the perimeter of your home, often close to where the water line enters. It’s usually a round wheel or lever.
Familiarize yourself with this essential component, and consider marking it clearly for quick identification. When you need to shut off the water supply, time is of the essence.
Regularly check that the valve operates smoothly; rust or debris can hinder its function. By being prepared, you’ll protect your home and feel more secure in managing unexpected plumbing crises.
Turn Off Appliances
As soon as you’ve shut off the main water valve, it’s vital to turn off any appliances that might be affected by the water supply, such as washing machines, dishwashers, or water heaters.
This step is essential for appliance safety, preventing further damage and potential electrical hazards.
Make sure you perform a power shutdown by unplugging these devices to eliminate any risk of electrical shock or fire while you address the burst pipe issue.
Additionally, check for any residual water in these appliances and drain them as necessary.
By taking these precautions, you protect your appliances and create a safer environment as you handle the cleanup process effectively.
Your proactive measures contribute greatly to maintaining your home’s integrity.
Removing Standing Water
When a burst pipe floods your space, removing standing water quickly is essential to prevent further damage and mold growth.
Start by evaluating the area for the deepest pockets of standing water. Use a wet/dry vacuum for effective water removal; this tool can handle significant volumes and is ideal for residential cleanups. If the water level is too high for the vacuum, consider using a submersible pump to expedite the process.
Make sure you wear protective gear, including gloves and boots, to minimize health risks. After removing the majority of water, use mops and towels for any remaining moisture.
Prompt action mitigates damage and helps restore your space, fostering a sense of safety and belonging.
Drying the Affected Area
After removing standing water, you should assess the extent of the water damage to determine what areas need attention.
Utilizing dehumidifiers effectively will accelerate the drying process, preventing mold growth and further structural issues.
Focus on maintaining ideal airflow and humidity levels to ensure thorough drying of the affected area.
Assess Water Damage
To effectively assess water damage in your home, it’s crucial to begin by thoroughly inspecting the affected area for signs of moisture and structural compromise.
Conduct a detailed water assessment by checking walls, floors, and ceilings for discoloration, warping, or mold growth. Use a moisture meter for precise readings, ensuring you identify all areas impacted by the leak.
Document your findings carefully, as this damage evaluation will guide your cleanup efforts and insurance claims. Pay close attention to hidden spaces, like behind cabinets or under carpets, where moisture can linger undetected.
Utilize Dehumidifiers Effectively
Utilizing dehumidifiers effectively can considerably expedite the drying process of your home after a burst pipe incident.
Start by selecting the right dehumidifier settings based on the humidity levels in the affected area. Aim for a relative humidity of around 30-60% for ideal moisture control.
Place the dehumidifier close to the wettest areas to maximize its efficiency. Monitor the water collection tank regularly and empty it as needed to maintain continuous operation.
If your dehumidifier has a continuous drainage option, use it to avoid interruptions. Additionally, keep doors and windows closed to prevent outside moisture from interfering with your drying efforts.
Cleaning and Disinfecting Surfaces
When dealing with a burst pipe, cleaning and disinfecting surfaces is essential to prevent mold growth and ensure a safe environment.
Start by removing any standing water and thoroughly drying the affected areas. Next, use a mixture of water and a suitable disinfectant to sanitize surfaces, ensuring you cover all potentially contaminated spots.
Pay special attention to porous materials, as they can harbor mold spores. After sanitizing, allow surfaces to dry completely, as moisture can encourage mold development.
Regularly inspect your cleaned areas for any signs of mold, and be proactive in addressing any issues.
Repairing the Burst Pipe
Once you’ve addressed the immediate cleanup, it’s essential to focus on repairing the burst pipe to prevent further water damage.
Start by identifying the pipe materials—PVC, copper, or galvanized steel—as this will dictate your repair techniques. For small leaks, using pipe clamps or epoxy putty can be effective.
If the damage is more extensive, you might need to replace the affected section. Cut out the damaged area and use couplings to join new pipe segments, ensuring a tight seal. Always use appropriate fittings to match the pipe materials.
After repairs, test the system for leaks before restoring water flow. This careful approach fixes the issue and strengthens your plumbing system against future problems.
Preventing Future Incidents
After you’ve repaired the burst pipe, taking steps to prevent future incidents is essential.
Start by investing in quality water insulation for your pipes, especially those exposed to cold temperatures. Insulating pipes helps maintain a steady temperature, reducing the risk of freezing and bursting.
Additionally, schedule regular seasonal maintenance to inspect your plumbing system. During these checks, look for signs of wear and tear, leaks, or corrosion.
It’s also wise to keep an eye on your water pressure; excessive pressure can strain your pipes.
Lastly, educate yourself about proper drainage systems and ensure gutters are clear to prevent water buildup.
Frequently Asked Questions
What Personal Protective Equipment Should I Wear During Cleanup?
You should wear protective gloves and safety goggles during cleanup. These items shield you from contaminants and potential hazards, ensuring your safety while you work effectively to restore the affected area.
How Long Does It Take to Dry a Flooded Area?
It typically takes 24 to 48 hours to dry a flooded area, depending on drying methods and time factors like humidity and airflow. Using fans and dehumidifiers accelerates the process, ensuring quicker recovery.
Is It Safe to Use Electrical Appliances After a Burst Pipe?
No, it isn’t safe to use electrical appliances after a burst pipe. Water safety is compromised, increasing appliance risks. Always disconnect power sources and wait for professional restoration before using any electrical devices in affected areas.
Can I Claim Insurance for Water Damage?
Yes, you can claim insurance for water damage if your policy includes coverage for such incidents. Review your insurance policy details and contact your provider to understand your coverage and the claims process.
What Should I Do if Mold Starts to Grow?
If you spot mold, don’t panic! Act fast with mold prevention techniques like ventilation and dehumidifiers. Use effective remediation methods to eliminate it, ensuring your space is safe and healthy for everyone involved.
Review
In the face of a burst pipe, maneuvering through the cleanup can feel overwhelming, but with the right techniques, you can turn a disaster into a manageable task. By promptly evaluating damage, shutting off the water, and employing effective drying and cleaning methods, you safeguard your home from further issues. Remember, proactive measures and thorough documentation restore your space and shield you from future mishaps. Stay vigilant, and you’ll keep your home a sanctuary, not a source of stress.